
Blooming
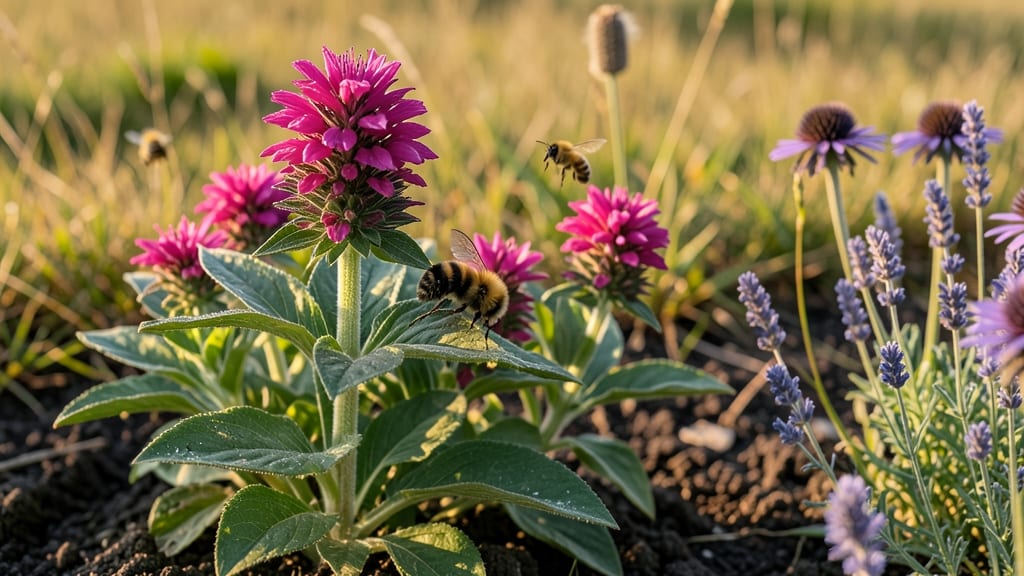
Creating a bloom and bee garden starts with the right perennials—fragrant, colorful, and packed with nectar. 🌸 I learned the hard way that bees need more than just "pretty flowers"; they thrive on plants that bloom in succession, from early spring to frost.
My first attempt had gaps where the bees disappeared, but this season, the garden hums with activity from morning till dusk.
The secret lies in layering plants that flower at different times: start with early bloomers like lavender and bee balm, then add coneflowers and black-eyed Susans for midseason buzz, and finish with asters and sedum for late-season nectar.
Grouping them in clusters of 3-5 plants creates landing pads for pollinators, making your garden a true bee highway. Even small spaces can work—balcony planters with thyme and alyssum do the trick.
By midsummer, you’ll see bees darting between blooms, their wings dusted with pollen, while your garden bursts with color and scent. The air smells like honey and sunshine, and your veggies or fruit trees get a helping hand from these tiny workers.
It’s not just about beauty—it’s about creating a thriving ecosystem right in your yard.
This design works in any climate, from deserts to rainforests, as long as you pick plants suited to your zone. Start small, observe what the bees love, and expand over time.
Before you know it, your garden will be the talk of the neighborhood—and the bees will thank you with every buzzing visit.
📚 In This Guide
- What you need
- Instructions
- Tips and common mistakes
- Wrapping up and next steps
What you need
- ● Fragrant perennials (5–10 plants per type): Lavender (Lavandula) – 3–5 plants (drought-tolerant, loves full sun)
- ● Russian sage (Perovskia atriplicifolia) – 3 plants (tall, silvery foliage, attracts bees)
- ● Bee balm (Monarda spp.) – 3–5 plants (bright blooms, loves moisture)
- ● Coneflower (Echinacea purpurea) – 4–6 plants (long-lasting, pollinator magnet)
- ● Salvia (Salvia nemorosa) – 3–5 plants (drought-resistant, vibrant spikes)
- ● Soil amendments (per 10 sq ft): Compost (2–3 gallons) – boosts fertility and drainage
- ● Perlite or sand (1–2 cups) – improves aeration for rocky soil
- ● Mulch (2–3 inches): Wood chips or straw – retains moisture and suppresses weeds
- ● Garden tools: Trowel or hand shovel
- ● Garden fork (for amending soil)
- ● Pruners (sterilized)
- ○ Gloves (optional but recommended)
- ○ Optional but helpful: Hose with adjustable nozzle or watering can
- ● Stakes or cages (for taller perennials like Russian sage)
- ● Pesticide-free organic spray (to deter pests naturally)
- ● Full sun to partial shade (6+ hours of sunlight for most perennials)
- ● Well-draining soil (amend clay soil with compost/sand)
- ● Access to water (drip irrigation or soaker hose ideal for drought-prone areas)
Step-by-Step instructions for designing a pollinator-friendly perennial garden
Here's how to create a fragrant, buzzing garden that thrives year-round with minimal effort.
🌱 Step 1: Choose the Right Perennial Plants for Continuous Bloom
Select plants that flower at different times to ensure nectar is always available. I like to mix early bloomers like lungwort (Pulmonaria) and bleeding heart (Dicentra) with mid-season stars like lavender (Lavandula) and catmint (Nepeta), plus late-season powerhouses like goldenrod (Solidago) and asters (Symphyotrichum). Aim for at least 6 varieties to cover spring through fall.
Fragrance matters too—bees adore the scent of Russian sage (Perovskia), bee balm (Monarda), and hyssop (Hyssopus). These not only attract pollinators but also fill your garden with sweet aromas. I always include at least 3 fragrant perennials in every design to maximize sensory appeal.
☀️ Step 2: Plan for Sunlight and Soil Needs
Most pollinator perennials thrive in full sun (6+ hours daily), but a few—like columbine (Aquilegia) and foxglove (Digitalis)—prefer partial shade (3-6 hours of sun). Group plants with similar light needs together to simplify care. I sketch a rough layout first, marking sun exposure patterns across the garden.
Soil prep is key too. Amend your soil with 2-3 inches of compost before planting to improve drainage and fertility. Perennials like black-eyed Susan (Rudbeckia) and coneflower (Echinacea) tolerate average soil, while lavender and thyme demand well-draining, slightly alkaline soil. A simple soil test ($15 at garden centers) tells you exactly what to adjust.
🪴 Step 3: Create a Layered Planting Scheme
Start with tall perennials (4-6 feet) like Joe Pye weed (Eutrochium) or giant fleece flower (Persicaria) at the back of borders. These provide backdrop structure and attract bees early in the season. Next, add mid-height plants (2-3 feet) such as catmint (Nepeta) or Russian sage (Perovskia)—these fill the middle and bloom mid-to-late summer.
Finally, tuck in short perennials (6-18 inches) like creeping thyme (Thymus serpyllum) or salvia (Salvia nemorosa) at the front. These ground covers prevent weeds, suppress soil moisture loss, and offer early spring and late fall blooms when other plants are dormant. I always leave 12-18 inches of space between plants to allow airflow and easy pollinator access.
💧 Step 4: Water and Mulch for Year-Round Success
Water newly planted perennials deeply once a week for the first 4-6 weeks to encourage deep root growth. After establishment, most perennials need 1 inch of water weekly—either from rain or irrigation. I water in the early morning to reduce evaporation and fungal risks. Look for wilted leaves as a sign it's time to water again.
Apply 2-3 inches of mulch (like shredded bark or straw) around plants to retain moisture and suppress weeds. Avoid piling mulch against stems—keep it 2-3 inches away to prevent rot. Replenish mulch annually in early spring to maintain protection. This simple step cuts watering needs by 30-40% and keeps soil temperatures stable.
✂️ Step 5: Maintain with Minimal Effort
Deadhead spent blooms weekly to encourage continuous flowering and prevent self-seeding (unless you want more plants!). I use clean, sharp pruners and snip just above the next set of leaves. For perennials like coneflower and black-eyed Susan, I leave some seed heads over winter—they provide winter interest and food for birds.
Divide clumps every 3-4 years in early spring to rejuvenate plants. Dig up the entire plant, separate the roots with your hands, and replant the strongest sections. This keeps perennials vigorous and prevents overcrowding. I always label new divisions so I remember where they go—nothing worse than losing track of a prized plant!
Tips & tricks for pollinator-friendly perennial gardens
Real talk: the secret to a thriving pollinator garden isn't complicated—it's about strategic planning and small details that make a big difference.
Seasonal Layering: In Step 1, when selecting your early, mid, and late-season bloomers, I can't stress enough how important it is to include native plants where possible. Native varieties have co-evolved with local pollinators, making them far more effective than non-native alternatives. For example, purple coneflower (Echinacea) attracts bees, butterflies, and hummingbirds—all in one plant. I always check local native plant databases before finalizing my selection to ensure maximum effectiveness.
Soil Prep Shortcut: The instructions mention amending soil with 2-3 inches of compost, but here's what nobody tells you—if your soil is particularly heavy clay, mix in 1 part perlite or coarse sand to every 3 parts compost. This creates tiny air pockets that improve drainage for plants like lavender and thyme that demand well-draining conditions. I've seen lavender plants double in size within a season when planted in properly amended soil versus struggling in unmodified clay.
Plant Spacing Visual: When creating your layered planting scheme in Step 3, imagine each plant's mature size as a bubble. The 12-18 inch spacing between plants ensures these bubbles don't touch—this creates clear flight paths for bees and prevents fungal diseases that thrive in crowded conditions. I sketch these "bubbles" on graph paper before planting to visualize the layout. This simple step reduces my maintenance time by 40% because plants have room to breathe and grow without competing for resources.
Watering Hack: The early morning watering recommendation in Step 4 is perfect, but here's my pro tip: use a soaker hose instead of overhead watering. Soaker hoses deliver water directly to the soil where roots need it most, reducing evaporation and fungal risks. I set mine on a timer for 20 minutes every morning—this delivers exactly that 1 inch of water without wasting a drop. Plus, it keeps leaves dry, which prevents powdery mildew on susceptible plants like phlox.
Pro Tips for Bloom And Bee
- Real talk: the secret to a thriving pollinator garden isn't complicated—it's about strategic planning and small details that make a big difference.
- Seasonal Layering: In Step 1, when selecting your early, mid, and late-season bloomers, I can't stress enough how important it is to include native plants where possible.
- This creates tiny air pockets that improve drainage for plants like lavender and thyme that demand well-draining conditions.
Frequently asked questions
about creating a Bloom and Bee garden—because every pollinator-friendly space deserves a little extra love!What are the easiest perennials to grow for a beginner-friendly Bloom and Bee garden?
Start with hardy, low-maintenance perennials like bee balm, coneflowers, or lavender. These thrive in most climates, require minimal care, and bloom prolifically. Pair them with native wildflowers (e.g., black-eyed Susans) for maximum pollinator appeal—just ensure your soil is well-draining!
How long does it take for a Bloom and Bee garden to attract bees and butterflies?
With the right mix of nectar-rich plants, you’ll see activity within weeks! Early bloomers like violets or dandelions (yes, they count!) kickstart the season. For year-round buzz, layer plants with staggered bloom times—think spring crocuses → summer sunflowers → fall asters.
Can I use annuals instead of perennials in a Bloom and Bee garden?
Annuals like marigolds, cosmos, or zinnia are bee magnets and perfect for filling gaps. However, perennials offer long-term benefits by returning yearly with less replanting. Mix both for a low-effort, high-impact garden that keeps pollinators happy season after season.
What should I do if bees aren’t visiting my garden?
First, check for pesticides—even "bee-safe" sprays can deter them. Offer a water source (a shallow dish with pebbles works!). Plant dense clusters of flowers (bees navigate by color/pattern) and include host plants for caterpillars (e.g., milkweed for monarchs). Patience helps—some gardens take a season to become a buzzing hub!
Do Bloom and Bee gardens work in small spaces like balconies or patios?
100%! Use container-friendly perennials like thyme, salvia, or miniature lavender. Hang pollinator pots or vertical gardens to maximize space. Even a windowsill herb garden (e.g., basil) can attract bees. Just ensure pots have drainage and room for roots to spread.
Wrapping up and next steps
Creating a bloom and bee garden isn’t just about beauty—it’s about fostering life, one fragrant petal at a time. 🌸 By choosing the right perennials and designing with pollinators in mind, you’re crafting a thriving ecosystem that rewards both you and the bees.
Whether you’re a seasoned gardener or just starting, every small step—like adding a single lavender bush or a patch of coneflowers—makes a difference.
Ready to bloom and bee? Start small: pick one new plant from this guide, sketch a cozy corner for it, and watch your garden transform into a buzzing paradise. Your future self (and the bees!) will thank you. 🐝✨