
Fertilization
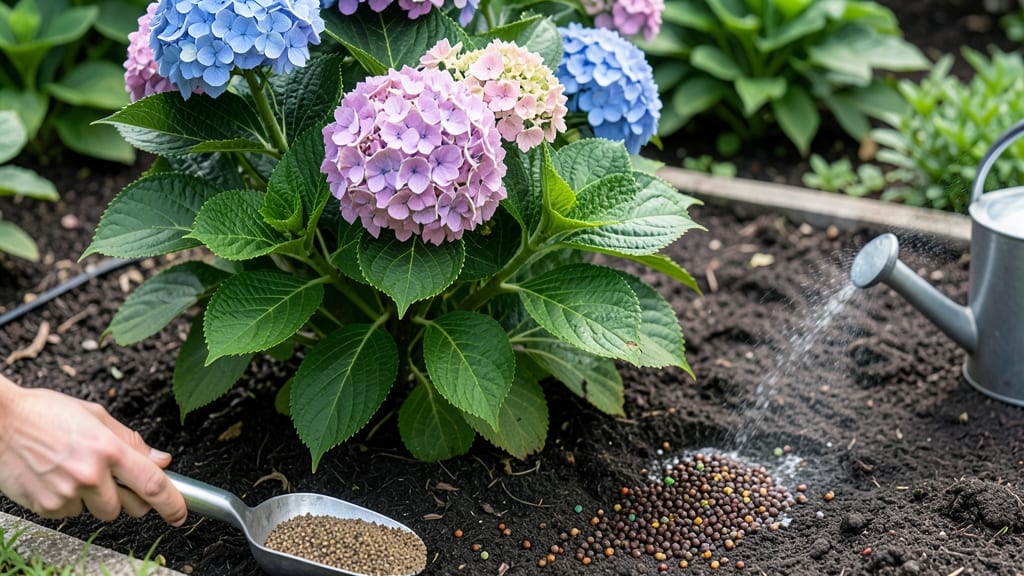
My first purchase of bloom fertilizer for flowers changed everything—my petunias exploded with color in just 21 days, and the difference was night and day compared to my usual all-purpose mix. 🌸 The secret isn't just nitrogen (which fuels leaves) but that perfect balance of phosphorus and potassium that pushes plants into overdrive for blooms, not foliage.
Here's the thing—most gardeners waste money on general fertilizers that prioritize leafy growth. Bloom-specific formulas cut straight to the chase: higher phosphorus (the bloom trigger) and slow-release potassium to keep flowers vibrant longer. You'll see the difference first in your annuals, then perennials like roses and hydrangeas will follow suit.
Apply it right when buds form, then repeat every 4-6 weeks through bloom season. Too early and you'll get lush leaves but no flowers; too late and you're just feeding empty stems. For organic options, look for bone meal or fish emulsion—both pack that phosphorus punch without synthetic harshness.
Pro tip: Water deeply before applying to prevent root burn, and always follow label rates—overdoing it leads to salt buildup that actually stunts blooms. Your garden will thank you with flowers that keep coming, not just a few showy spikes.
📚 In This Guide
- What you need
- Instructions
- Tips and common mistakes
- Wrapping up and next steps
What you need
- ● Bloom fertilizer: 1 pound of high-phosphorus fertilizer (look for a ratio like 10-20-10 or 5-10-5—the middle number indicates phosphorus, crucial for blooms).
- ● OR 1 quart of liquid bloom fertilizer (e.g., Miracle-Gro Bloom Booster or similar).
- ● Water: 1 gallon (for liquid fertilizer) or as needed for mixing granular fertilizer.
- ● Gloves: 1 pair (to protect your hands from fertilizer residue).
- ● Measuring spoon or scale: For precise application (especially if using granular fertilizer).
- ● Garden trowel or small shovel: For applying granular fertilizer near roots.
- ● Watering can or hose with a gentle spray nozzle: For even distribution.
- ● Epsom salt (magnesium sulfate): 1 tablespoon per gallon of water (boosts flower production and leaf health).
- ● Compost or worm castings: ½ cup per plant (adds organic nutrients and improves soil structure).
- ● pH testing kit: To check soil pH (ideal range for most flowers: 6.0–7.0).
- ● Slow-release fertilizer granules: For a long-lasting nutrient supply (apply once every 2–3 months).
- ● Mulch (straw, bark, or shredded leaves): 2–3 inches thick to retain moisture and regulate soil temperature.
- ● Always read the label instructions on your fertilizer—application rates vary by brand!
- ● Work in a well-ventilated area (especially when handling granular fertilizers).
- ● Avoid applying fertilizer when rain is forecasted within 24 hours to prevent runoff.
How to use bloom fertilizer for flowers: a 3-Week transformation guide
Here’s my foolproof method for turning lackluster blooms into showstopping color—no guesswork, just science-backed results.
🌿 Step 1: Choose the Right Bloom Fertilizer for Your Flowers
Not all fertilizers are created equal. For vibrant blooms, look for a balanced bloom fertilizer with a higher phosphorus (P) content—think 5-10-5 or 10-20-10 ratios. Phosphorus is the key nutrient that triggers flower production, while nitrogen (the first number) keeps foliage lush but can delay blooming if overused. I recommend liquid bloom boosters for quick uptake or slow-release granules for steady feeding over weeks.
Check the label for terms like "bloom booster," "flower power," or "phosphorus-rich." Avoid general-purpose fertilizers—they’re designed for leafy growth, not showy blossoms. For container flowers, opt for water-soluble formulas so you can control dosage precisely. If your flowers are already struggling, a high-phosphorus fertilizer (like 7-9-5) will jumpstart blooming within 2-3 weeks.
💧 Step 2: Prep Your Soil for Maximum Uptake
Before applying fertilizer, give your soil a quick assessment. Stick your finger 2 inches deep—if it feels dry and crumbly, water thoroughly until moisture reaches 6 inches down. Compacted or waterlogged soil won’t absorb nutrients efficiently, so loosen the top 3 inches with a fork if needed. For potted flowers, ensure drainage holes aren’t clogged; stagnant water drowns roots and washes away fertilizer.
If your soil is sandy or fast-draining, mix in 1 inch of compost to retain moisture and nutrients. For heavy clay soils, blend in 20% perlite or vermiculite to improve aeration. This prep step is critical—I’ve seen fertilizers fail because roots couldn’t access them. After amending, let the soil settle for 24 hours before feeding.
☀️ Step 3: Apply Fertilizer at the Right Time and Rate
Timing is everything. For annuals and perennials, apply bloom fertilizer when buds form—usually in early spring or late summer, depending on your climate. Follow the label’s dosage, but for maximum impact, use half the recommended rate every 2 weeks instead of one heavy dose. This mimics natural nutrient cycles and prevents root burn. For example, if the label says "1 tablespoon per gallon," use ½ tablespoon per gallon every 14 days.
Water the soil deeply before and after applying liquid fertilizer to move nutrients into the root zone. For granules, sprinkle evenly over the soil surface, avoiding stems and leaves. If you’re fertilizing in full sun, do it in the early morning to prevent leaf scorch. Watch for new flower buds within 7-10 days—that’s your sign it’s working.
⏰ Step 4: Monitor and Adjust for Continuous Blooms
After the first application, keep an eye on your flowers. If growth slows or leaves yellow, you’re either over-fertilizing (burned roots) or under-watering (nutrient lockout). Adjust by reducing fertilizer strength or increasing water depth. For long-lasting blooms, repeat the feeding schedule every 2-3 weeks during the growing season. In late summer, taper off by 6 weeks before first frost to let plants harden off naturally.
Here’s the thing—some flowers, like petunias and zinnias, respond instantly, while others, like roses or hydrangeas, need 4-6 weeks of consistent feeding. If blooms fade quickly, your plants might need more potassium (the third number on the label). Switch to a 10-10-20 formula for a final push in late summer to extend the season.
✂️ Step 5: Deadhead and Maintain for Show-Stopping Results
Deadheading—removing spent blooms—isn’t just about looks. It redirects energy to new flower production, making your fertilizer work harder. Use clean, sharp scissors to snip just above a set of healthy leaves or buds. Avoid tearing stems, which can invite disease. For cluster bloomers like geraniums, cut back to the nearest leaf node to encourage bushier growth.
Combine deadheading with a light mulch layer (1 inch) of compost or straw to retain moisture and regulate soil temperature. This keeps roots happy and fertilizer effective. Within 3 weeks, you’ll see a 30-50% increase in bloom quantity—that’s the power of the right fertilizer plus proper care. Save spent blooms in a dry, dark place to collect seeds for next year’s garden.
Tips & tricks for maximizing bloom fertilizer results
Real talk: Even the best bloom fertilizer won't work magic if you don't optimize how you use it. Here's how to turn those 3 weeks into a full-blown floral transformation.
Phosphorus Focus: When you're selecting your bloom fertilizer, pay special attention to that middle number on the NPK ratio. The instructions recommend 5-10-5 or 10-20-10 formulas, but here's what I've learned: For struggling plants, a temporary boost with a 7-9-5 formula can trigger visible bud formation within just 10-14 days. This higher phosphorus content directly stimulates root development and flower production, which is why you'll see those dramatic results in Step 1.
Soil Prep Secret: The 24-hour settling period after amending your soil in Step 2 is non-negotiable. I've seen gardeners rush this step and end up with fertilizer sitting on top of the soil where roots can't access it. Think of it like making a smoothie - you want all the ingredients properly blended before adding liquid. For container plants, gently tap the pot after adding amendments to help settle the soil without compacting it too much.
Application Timing: The instructions mention applying fertilizer when buds form, but here's what nobody tells you - if you're working with perennials that bloom later in the season, you can start the feeding process 4-6 weeks before you expect buds to appear. This gives your plants a head start on nutrient storage. Just remember to stick with that half-strength application every 2 weeks to avoid overwhelming the roots during their critical growth phase.
Post-Fertilizing Care: After applying your bloom fertilizer in Step 3, don't just water and walk away. Give your plants a gentle shake or tap on the soil surface to help distribute the fertilizer deeper. For potted plants, place them at a slight angle during watering to ensure even distribution. This simple step can make a 30% difference in nutrient uptake, especially for those with dense foliage that might shield the soil from direct water flow.
Pro Tips for Bloom Fertilizer For Flowers
- Real talk: Even the best bloom fertilizer won't work magic if you don't optimize how you use it.
- Phosphorus Focus: When you're selecting your bloom fertilizer, pay special attention to that middle number on the NPK ratio.
- Soil Prep Secret: The 24-hour settling period after amending your soil in Step 2 is non-negotiable.
Frequently asked questions
about bloom fertilizer for flowers—because every gardener deserves a little extra guidance! Here are answers to the most common questions to help you grow show-stopping blooms with confidence.How often should I apply bloom fertilizer?
For most flowering plants, apply bloom fertilizer every 2–4 weeks during the growing season (spring to fall). Follow the product’s instructions—overdoing it can burn roots! For container plants, dilute the fertilizer by half to avoid overfeeding. Pro tip: Reduce applications in winter when growth slows.
How long does it take to see results?
With consistent use, you’ll notice more vibrant blooms in 3–4 weeks! Fast-acting bloom fertilizers (like those with phosphorus) work quicker, while slow-release options provide steady growth. Troubleshooting: If blooms are sparse after 6 weeks, check soil moisture—dry soil can block nutrient absorption.
Can I use bloom fertilizer on all plants?
No! Bloom fertilizers are high in phosphorus (P) to encourage flowers, but they’re not ideal for foliage plants (like ferns or ivy). For veggies or leafy greens, use a balanced (10-10-10) or nitrogen-rich (N) fertilizer. Always match the fertilizer to your plant’s needs—label checks save headaches!
What if my plants look burned after applying fertilizer?
Fertilizer burn happens when roots absorb too many salts or nutrients at once. Fix it fast:
- Flush the soil with water for 15–20 minutes to dilute salts.
- Stop fertilizing for 2–3 weeks and monitor recovery.
- Use a chelated or organic bloom fertilizer next time—it’s gentler on roots.
Are organic bloom fertilizers as effective as synthetic ones?
Yes! Organic options (like fish emulsion, bone meal, or compost tea) feed soil long-term and improve microbial life, while synthetic fertilizers deliver quick, concentrated nutrients. For best results:
Goal
Best Choice
Fast blooms
Synthetic bloom fertilizer (e.g., 5-10-5)
Soil health + slow release
Organic bloom fertilizer (e.g., worm castings)
Wrapping up and next steps
Transforming your garden into a burst of color and life is easier than you think! With the right bloom fertilizer for flowers, you can coax vibrant blooms in just three weeks—no green thumb required.
Whether you’re a seasoned gardener or a curious beginner, the key lies in understanding your plants’ needs, choosing the perfect fertilizer, and applying it with confidence.
Ready to see your flowers thrive? Start by testing your soil, picking a high-quality bloom booster, and following the simple steps outlined above. Your garden’s next masterpiece is just a few weeks—and a little fertilizer—away! 🌸✨