
Blooming
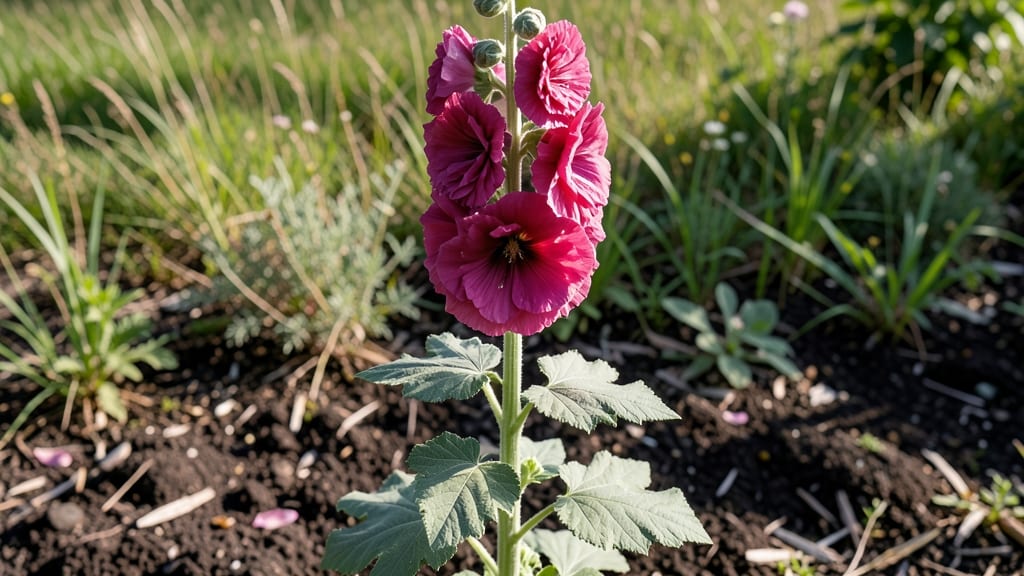
Double bloom hollyhocks transform your garden into a vertical masterpiece—towering stems packed with layered petals that bloom twice in one season. 🌸 I’ve grown these showstoppers for years, and the secret to their nonstop drama lies in a few simple but critical tricks, starting with the right planting approach.
These hollyhocks need full sun (6+ hours daily) and well-draining soil—amend heavy clay with compost to prevent floppy stems. Plant seeds directly in spring (they hate transplants) or start indoors 6-8 weeks before last frost, then harden off gradually.
The double-bloom varieties like ‘Black Knight’ or ‘Peach Blush’ are worth the extra care—they’re twice as lush as singles but need consistent moisture to support those heavy blooms.
By summer, you’ll watch stems shoot up 5-7 feet tall, each crowned with two waves of blooms—the first in early summer, the second in late summer if you follow the reblooming tricks.
Deadhead spent flowers regularly, and fertilize lightly with balanced 10-10-10 every 4-6 weeks to keep them flowering. Just don’t overfeed—too much nitrogen means fewer blooms and more leaves. The payoff? A garden centerpiece that thrives for years with minimal fuss.
Whether you’re dealing with floppy stems (stake them early!) or aphid infestations (spray with soapy water), these tricks keep your hollyhocks standing tall and blooming boldly. Let’s get those seeds in the ground!
📚 In This Guide
- What you need
- Instructions
- Tips and common mistakes
- Wrapping up and next steps
What you need
- ● Double Bloom Hollyhock Seeds: 10–20 seeds (choose heirloom varieties like 'Black Prince' or 'Peach Blush' for guaranteed double blooms).
- ● Well-draining potting mix: 2–3 gallons (or garden soil amended with 30% compost for in-ground planting).
- ● Containers or garden bed: For containers: 12–18" deep pots (1–2 plants per container).
- ● For in-ground: Full sun (6+ hours/day) and loose, fertile soil.
- ● Fertilizer: Balanced 10-10-10 or organic options like fish emulsion (mix 1 tbsp per gallon of water).
- ● Stakes or trellis: 3–4 ft tall (hollyhocks can grow 4–6 ft!).
- ● Pruning shears: Sharp, sterilized shears for deadheading.
- ● Watering can or hose with gentle nozzle: Hollyhocks hate soggy roots!
- ● Mulch (straw or shredded leaves) to retain moisture.
- ● Slow-release fertilizer tablets for convenience.
- ● Peat moss or perlite to improve drainage in heavy clay soil.
- ● Plant markers to track varieties (especially if testing multiple seeds!).
Step-by-Step guide to coaxing extra blooms from hollyhocks
Here’s how I’ve learned to push hollyhocks into a second flush—no fancy fertilizers, just smart pruning and timing.
✂️ Step 1: Deadhead Strategically After First Bloom
Once your hollyhocks finish their first flush, grab your pruners and cut back each spent flower stalk to just above the first set of healthy leaves below the bloom. This tells the plant to redirect energy into new side shoots instead of seed production. I always make the cut at a slight angle to prevent water from pooling—hollyhocks hate soggy stems.
Watch for new buds forming at the leaf axils within 2-3 weeks. These are your future blooms, so don’t rush the process. If you cut too aggressively, you’ll sacrifice the plant’s stored energy and delay the second flush. Think of it like giving your hollyhocks a second chance to shine.
🌱 Step 2: Feed and Water for Rebloom Energy
After deadheading, apply a balanced 10-10-10 fertilizer at half strength to encourage new growth. Hollyhocks are heavy feeders, but too much nitrogen will give you leaves instead of flowers. I mix mine with 2 tablespoons of bone meal per plant to boost phosphorus for root development—this is the secret to stronger stems for that second bloom.
Water deeply once a week during dry spells, keeping the soil 2-3 inches moist but never soggy. Hollyhocks have deep taproots, so they’ll forgive occasional dry spells, but consistent moisture keeps the foliage lush and the blooms vibrant. You’ll know you’re on track when new shoots emerge within 7-10 days of feeding.
☀️ Step 3: Prune for Airflow and Light Exposure
Thin out crowded stems to improve airflow—this prevents fungal diseases like rust, which can ruin a second bloom. Remove any weak or leggy growth that’s competing with stronger stems. I like to leave 3-4 of the strongest shoots per plant, cutting the rest back to the ground. This might seem drastic, but it forces the plant to focus its energy where it counts.
Hollyhocks need full sun (6+ hours daily) to rebloom reliably. If your plants are in partial shade, you’ll likely get only one flush. Move them to a sunnier spot if possible, or accept that a second bloom may not happen. You’ll see the difference in just a few weeks—healthier stems mean more buds.
⏰ Step 4: Time Your Late-Season Care
For a fall rebloom, start this process 6-8 weeks before your first frost date. Hollyhocks need time to recover from the first flush and develop new buds. If you live in a warm climate, you might even get a third bloom with consistent care. I’ve seen mine push into early winter in Zone 7 with protection from light frosts.
Stop fertilizing 4-6 weeks before frost to harden off the plants. This helps them store energy for next year. Mulch with 2-3 inches of straw to insulate roots through winter. Come spring, you’ll have stronger stems ready to bloom again—no need to start from scratch.
Tips & tricks for perfect hollyhock reblooming
These insider strategies will help you coax a stunning second flush from your hollyhocks without sacrificing next year's blooms.
Precision Deadheading: When deadheading in Step 1, look for the first set of healthy leaves below the spent bloom—this is your cutting point. I've found that cutting at a 45-degree angle (not straight across) prevents water from pooling on the stem, which hollyhocks particularly dislike. For plants with multiple stems, prioritize cutting the strongest, most vertical shoots first—they'll produce the most dramatic second blooms. The 2-3 week window for new buds to appear is critical; if you see buds forming earlier, that's a good sign your plant has plenty of stored energy.
Fertilizer Timing Strategy: The half-strength 10-10-10 application in Step 2 works best when applied in the morning so the roots have all day to absorb nutrients. I've noticed that adding bone meal (2 tablespoons per plant) creates a noticeable difference in stem strength within just 10 days. For organic gardeners, you can substitute compost tea at half strength—just be consistent with the weekly watering to ensure proper nutrient uptake. The key is balance: too much nitrogen now means fewer flowers later.
Sunlight Optimization: Hollyhocks in Step 3 need that full sun (6+ hours daily), but not all sunlight is equal. If your plants are in partial shade, try moving them to a sunnier location for at least 4 hours of direct sun—this often makes the difference between a second bloom and none. I've seen dramatic improvements when plants get morning sun (cooler) followed by afternoon sun (warmer), which helps prevent leaf scorch while still providing enough energy for flowering.
Seasonal Transition Hack: When preparing for frost in Step 4, I've developed a trick to extend the blooming season: wrap the base of each plant with burlap (not plastic) when nighttime temperatures drop below 40°F. This creates a microclimate that can protect tender stems for another 2-3 weeks. The 4-6 week window before frost is your last chance to coax those final buds—don't rush the mulching process, as proper insulation takes about 10 days to fully establish.
Pro Tips for Double Bloom Hollyhocks
- These insider strategies will help you coax a stunning second flush from your hollyhocks without sacrificing next year's blooms.
- Precision Deadheading: When deadheading in Step 1, look for the first set of healthy leaves below the spent bloom—this is your cutting point.
- Fertilizer Timing Strategy: The half-strength 10-10-10 application in Step 2 works best when applied in the morning so the roots have all day to absorb nutrients.
Frequently asked questions
Got questions about keeping your double bloom hollyhocks in peak performance? We’ve got answers!
Whether you're troubleshooting flops or optimizing growth, here are the most common queries from gardeners just like you.
Why aren’t my double bloom hollyhocks reblooming like they did last year?
Reblooming can be finicky! Hollyhocks often skip their second bloom if they’re overcrowded, nutrient-deficient, or stressed by heat/drought. Try deadheading spent blooms, fertilizing lightly with a balanced formula (10-10-10), and watering deeply 1-2 times per week. Pro tip: Prune leggy stems in early summer to encourage bushier growth!
When is the best time to plant double bloom hollyhocks for maximum blooms?
Plant them in early spring (after the last frost) or late summer (6-8 weeks before the first frost) for the best results. Hollyhocks thrive in cool weather and can handle light frosts. If planting in summer, keep soil moist until roots establish (usually 4-6 weeks). Bonus: They self-seed easily, so you might get surprise blooms the following year!
Can I grow double bloom hollyhocks in containers? What’s the best pot size?
Yes! They adapt well to containers but need room to grow. Aim for a pot at least 12-18 inches wide and deep with drainage holes. Use a high-quality potting mix with compost, and rotate the pot occasionally for even sunlight. Watch out: Containers dry out faster, so monitor soil moisture closely—hollyhocks hate soggy roots!
My hollyhocks have holes in the leaves—what’s eating them, and how do I stop it?
Hollyhock rust (a fungal disease) and hollyhock borers are the usual culprits. For rust (yellow/orange spots), remove infected leaves and space plants for airflow. For borers (chewed stems), inspect stems weekly and prune infested areas. Preventative tip: Spray with neem oil early in the season to deter pests!
Are there any low-maintenance alternatives to double bloom hollyhocks with similar drama?
Try Alcea rosea ‘Chater’s Double’ (another double-bloom variety), hollyhock hybrids like ‘Black Night’ (disease-resistant), or tall snapdragons for vertical interest. For even less fuss, delphiniums or foxgloves offer striking height with minimal deadheading. Quick swap: All three thrive in similar conditions (full sun, well-drained soil).
Wrapping up and next steps
Double bloom hollyhocks are a gardener’s dream—packed with vertical drama and effortless reblooming when you know the tricks! With the right care—like deadheading, proper spacing, and a nutrient boost—you can enjoy their bold blooms all season long. 🌸
Ready to transform your garden? Start by applying these reblooming tips this season and watch your hollyhocks thrive. Need more inspiration? Explore our guide to companion plants to create a stunning, low-maintenance vertical display!