
Blooming
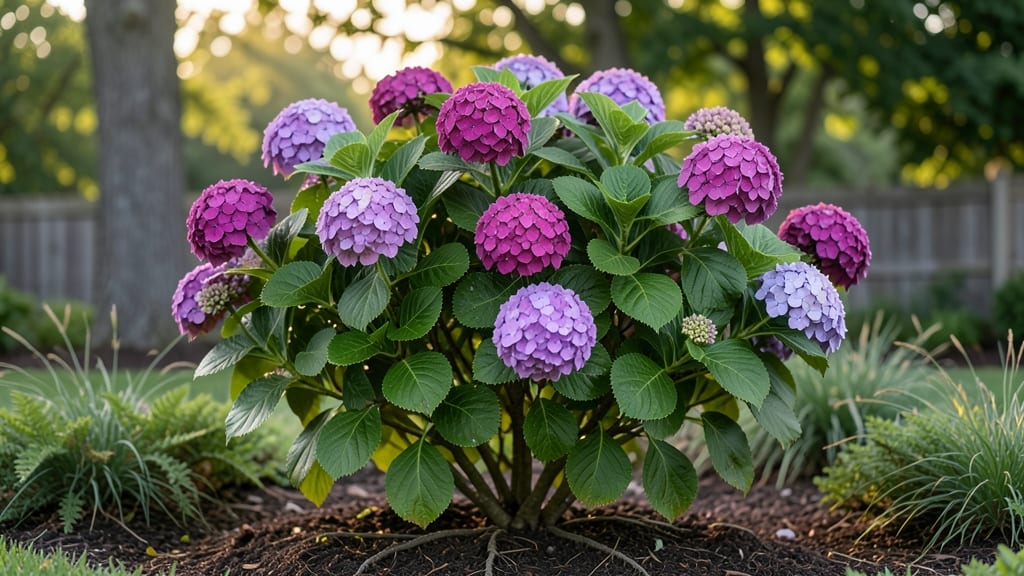
Turn your hydrangea bloom color from pastel pink to deep blue—or anywhere in between—just by adjusting the soil. 💙 The secret lies in aluminum availability, which changes with pH, and it’s easier than you think.
I’ve shifted blooms from pale lavender to rich cobalt in my own garden by tweaking one simple factor, and you can too. Most gardeners don’t realize their hydrangeas are already capable of this color magic—they just need the right soil conditions.
Test your pH first (aim for 5.5–6.0 for blues, 6.5–7.0 for pinks), then add aluminum sulfate or lime to steer the color where you want it. The results show up within 4–6 weeks of consistent care.
You’ll end up with blooms that match your decor perfectly—no more guessing about which variety to plant. The key is patience and precision: too much aluminum? Your flowers might turn greenish. Too little? They’ll stay stubbornly pink. But when it works, it’s like having a color-changing garden.
This trick works for bigleaf, oakleaf, and panicle hydrangeas alike. Once you master it, you’ll never buy flowers just to match your porch pillows again!
📚 In This Guide
- What you need
- Instructions
- Tips and common mistakes
- Wrapping up and next steps
What you need
- ● Soil pH Test Kit – Digital or liquid test kit (e.g., Luster Leaf or LaMotte for accuracy).
- ● Garden Lime (Calcium Carbonate) – 5-10 lbs per 100 sq. ft. (for raising pH to blue).
- ● Sulfur (Elemental or Aluminum Sulfate) – 1-2 lbs per 100 sq. ft. (for lowering pH to pink).
- ● Garden Gloves & Safety Goggles – Protect your hands and eyes when handling sulfur.
- ● Garden Fork or Tiller – For mixing amendments into the soil (6–12 inches deep).
- ● Watering Can or Hose – To hydrate plants post-amendment.
- ● pH Adjustment Calculator – Free online tools (e.g., University of Minnesota Extension) to determine exact amounts.
- ● Organic Matter – Compost or peat moss (1–2 inches) to improve soil structure and buffer pH swings.
- ● pH Buffer (e.g., Pine Needles or Coffee Grounds) – Natural alternatives for gradual pH shifts (acid-loving plants only!).
- ● Soil Moisture Meter – Ensures consistent hydration post-treatment.
- ● Labeling Stakes – To track which hydrangeas received which amendments.
How to change hydrangea bloom color using soil pH
Here’s the simple science behind shifting those blooms from pink to blue—and how to do it without guesswork.
🌱 Step 1: Test Your Current Soil pH
Before making changes, grab a soil pH test kit (available at garden centers) and test your hydrangea’s soil. Dig a 2-inch deep hole near the plant’s roots, collect a small sample, and follow the kit’s instructions. Most hydrangeas grow best in soil with a pH between 5.5 and 6.5—outside this range, their color shifts dramatically.
If your soil tests above 6.5, your blooms will lean pink or red. Below 5.5, they’ll turn blue or purple. I like to test in early spring before new growth begins, so I have time to adjust before blooming season. Write down the pH number—you’ll need it for the next step.
💧 Step 2: Adjust pH for Blue Blooms (Lower pH)
For blue blooms, aim for a soil pH of 5.0 to 5.5. The easiest way to lower pH is by adding elemental sulfur or peat moss. Sprinkle 1 pound of elemental sulfur per 100 square feet of soil around the plant’s drip line (the area where water naturally falls). Water it in thoroughly—this takes 2-4 weeks to fully adjust the soil.
Alternatively, mix 2-3 inches of peat moss into the top 6 inches of soil. Peat moss is acidic and will gradually lower pH over time. Test again after 4-6 weeks to confirm the change. Avoid overdoing it—hydrangeas can’t handle soil below 4.5, or their roots suffer.
☀️ Step 3: Adjust pH for Pink Blooms (Raise pH)
To shift blooms to pink or red, raise the pH to 6.0 to 6.5 using garden lime (calcium carbonate). Apply ½ to 1 pound of lime per 100 square feet, spreading it evenly over the soil surface. Water it in well, and wait 4-6 weeks for the pH to stabilize. Lime works slowly, so don’t rush—testing after 2 weeks will likely show little change.
If your hydrangea is in a container, mix 1 tablespoon of lime into the top 2 inches of soil for every 1-gallon pot. Containers dry out faster, so you may need to reapply lime every 2-3 months to maintain the pH. Always water after amending to help the soil absorb the changes.
⏰ Step 4: Maintain pH for Consistent Color
Once you’ve achieved your desired pH, retest every 6 months to ensure it stays in the target range. Soil pH naturally shifts over time due to rain, decomposition, and other factors. If blooms start fading or shifting colors unexpectedly, it’s time to adjust again.
For ongoing maintenance, use organic mulch like pine bark or oak leaves to help stabilize pH. These materials are slightly acidic and can reinforce a lower pH over time. Avoid synthetic fertilizers with high nitrogen—they can throw off pH balance faster than natural amendments.
🌿 Step 5: Monitor and Adjust for Best Results
Watch your hydrangea’s new blooms closely. If they’re lighter than expected, your pH may not have shifted enough—reapply the amendment and test again in 2 weeks. If blooms look washed out or small, it could mean nutrient deficiency (hydrangeas need balanced fertilizer too). A 10-10-10 or 20-20-20 fertilizer in early spring keeps them healthy.
Real talk: Some hydrangeas, like Endless Summer varieties, are less responsive to pH changes because they bloom on old wood. If you’re not seeing dramatic shifts, try pruning in late winter to encourage new growth—and new color potential. Patience is key—full color changes can take 1-2 full growing seasons to stabilize.
Tips & tricks for perfect hydrangea bloom color transformation
These insider tricks will help you avoid common pH pitfalls and get stunning results your first season.
Timing is Everything: Don't rush the pH adjustment process—those 2-4 weeks for elemental sulfur or 4-6 weeks for lime are non-negotiable. I learned this the hard way after impatiently testing too soon and getting inconsistent results. The soil needs time to fully absorb and integrate the amendments. For container plants, the 2-3 month reapplication schedule is crucial because potted soil dries out faster and loses pH balance quicker than in-ground soil.
Visual Cues for Testing: When testing your soil pH in Step 1, look for these visual clues: healthy hydrangea leaves should be vibrant green, not yellowing or browning. The blooms themselves will give you the best indication—deep blue means you're in the 5.0-5.5 range, while bright pink confirms 6.0-6.5. If your blooms look more lavender than blue, you're likely in that tricky 5.5-6.0 transition zone where colors blend.
Container Plant Special Care: For potted hydrangeas, mix your amendments directly into the top 2 inches of soil rather than spreading on the surface. The roots in containers are concentrated near the top, so they'll absorb the pH adjustments more effectively. Also, water your containers after amending to help distribute the lime or sulfur evenly through the root zone—this prevents concentrated spots that could burn roots.
Seasonal Strategy: Plan your pH adjustments around your hydrangea's natural growth cycle. For most varieties, aim to complete the full 4-6 week adjustment process by late spring, just as new growth begins. This gives the plant time to establish itself in the new soil conditions before flowering. If you're working with Endless Summer varieties, consider doing a partial adjustment in early spring and completing it after late winter pruning to maximize color potential.
Pro Tips for Hydrangea Bloom Color
- These insider tricks will help you avoid common pH pitfalls and get stunning results your first season.
- Timing is Everything: Don't rush the pH adjustment process—those 2-4 weeks for elemental sulfur or 4-6 weeks for lime...
- Visual Cues for Testing: When testing your soil pH in Step 1, look for these visual clues: healthy hydrangea leaves s...
Frequently asked questions
about hydrangea bloom colors—because every gardener deserves a little magic in their flowers!Why are my hydrangea blooms changing color mid-season?
Color shifts mid-season usually happen due to fluctuating soil pH or nutrient imbalances. If your blooms started pink but turned blue (or vice versa), check your soil pH with a test kit. Rainwater or fertilizer runoff can also alter pH levels—amend the soil gradually with lime (to raise pH) or sulfur (to lower it) for consistent results.
How long does it take for hydrangea color changes to show after adjusting pH?
Patience is key! Changes typically appear 6–12 months later, as the plant grows new blooms. For faster (but temporary) results, use pH-specific flower food in water—though this only affects fresh-cut blooms, not the plant’s long-term color. Test soil pH again in 3–6 months to confirm adjustments.
Can I get hydrangeas to bloom in other colors besides pink and blue?
Yes! While pink/blue shifts rely on pH, some hydrangeas naturally bloom in white, red, purple, or green (like Hydrangea macrophylla ‘Limelight’ or H. paniculata ‘Little Quickfire’). For permanent red blooms, try ‘Endless Summer’ series—these are less pH-sensitive and often stay true to their color.
My hydrangeas are brown and crispy—will they still bloom next year?
Brown, dry blooms are often a sign of underwatering, over-sun, or heat stress—not necessarily a death sentence! If the leaves are still green, the plant may recover. Prune dead blooms in late winter/early spring and water deeply (1–2 inches per week). If the stems are also brown, the plant might be dead, but check for new growth at the base before giving up!
Can I reuse soil from last year to grow hydrangeas with a different color?
Not ideal! Old soil may retain residual pH levels or salts from past fertilizers, skewing your results. For best color control, refresh the soil with a mix of peat moss, compost, and perlite (for drainage). Test the pH of the new mix before planting—aim for 5.2–5.5 for blue or 6.0–7.0 for pink.
Wrapping up and next steps
The magic of hydrangea bloom colors—from pink to blue—boils down to one simple but powerful factor: soil pH. 🌸 With the right tools, a little patience, and a dash of science, you can transform your garden into a vibrant canvas.
Whether you're a seasoned gardener or just starting, experimenting with pH levels is a rewarding way to unlock nature’s full palette.
Ready to dive in? Grab your pH test kit, adjust your soil, and watch your hydrangeas bloom with confidence! 🌿 Start testing your soil today—your future blue (or pink!) masterpiece awaits!